Where creation tools fall short
Editors are good at layers and retouching. Design tools are good at iteration. Grading tools are built around timelines.
Comparison is usually a side effect. You toggle layers. You squint. You rely on a single summary metric. You can see that something changed. You still cannot tell what it means.
For that kind of review, you need inspection tools. The loupe lets you zoom a suspicious area and quickly alternate between the left and right images, so you can verify local changes.
Align images first
If one image is shifted, scaled, or cropped, a naive diff treats the images as completely different. Aligning the images minimizes differences between matching pixels so the residual reflects actual change.
There are four common alignment modes:

Use Find Smaller Image in Larger when one image is a crop, inset, or appears inside a larger frame.
Look first. Choose the right view.
Once the images are aligned, the next question is not “how much did it change?” but “what kind of change is this?”
Start with a visual mode. You are trying to localize the change and understand its character before measuring anything.
- Split or Side-by-side when you are not yet sure what changed.
- Change Boxes when you want to quickly see where differences are concentrated.
Once you know where to look, switch to an analytical mode or metric that answers a narrower question.
Make the call at 1:1
Overview first. Native pixels second.
At whole-image scale you catch composition drift, spacing issues, and large contrast shifts. At 1:1 you see whether the change is real, expected raster noise, or actual loss of detail. Decisions made only on a fitted view are often wrong.
Use metrics for narrower questions
Metrics are not summaries. They come after inspection.
Visual review tells you where to look. A metric answers a narrower question about that area. If you start with a metric, you get a number without context. If you start visually, you get a hypothesis you can test.
- Edge Difference for shape, contour, and layout changes.
- Absolute Difference for exact per-pixel change.
- Blurred Difference to suppress pixel noise and reveal larger drift.
- SSIM for structural similarity, not exact equality.
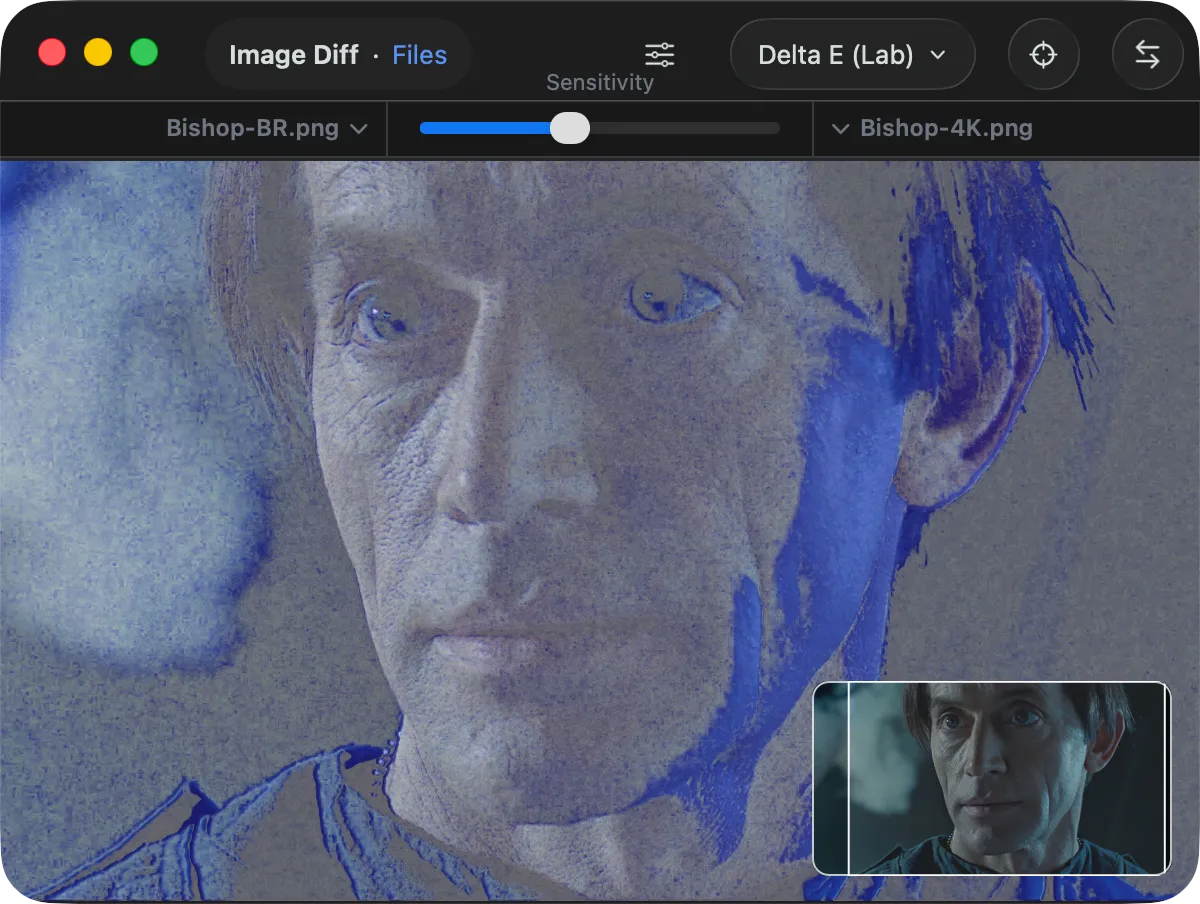
- Delta E for visible color fidelity.
Ask a narrower question before you reach for a metric. Otherwise the metric becomes a comfort object rather than evidence.
Resolve the change locally
Decisions are rarely global. Once you know where to look, a small region is more informative than the full frame.
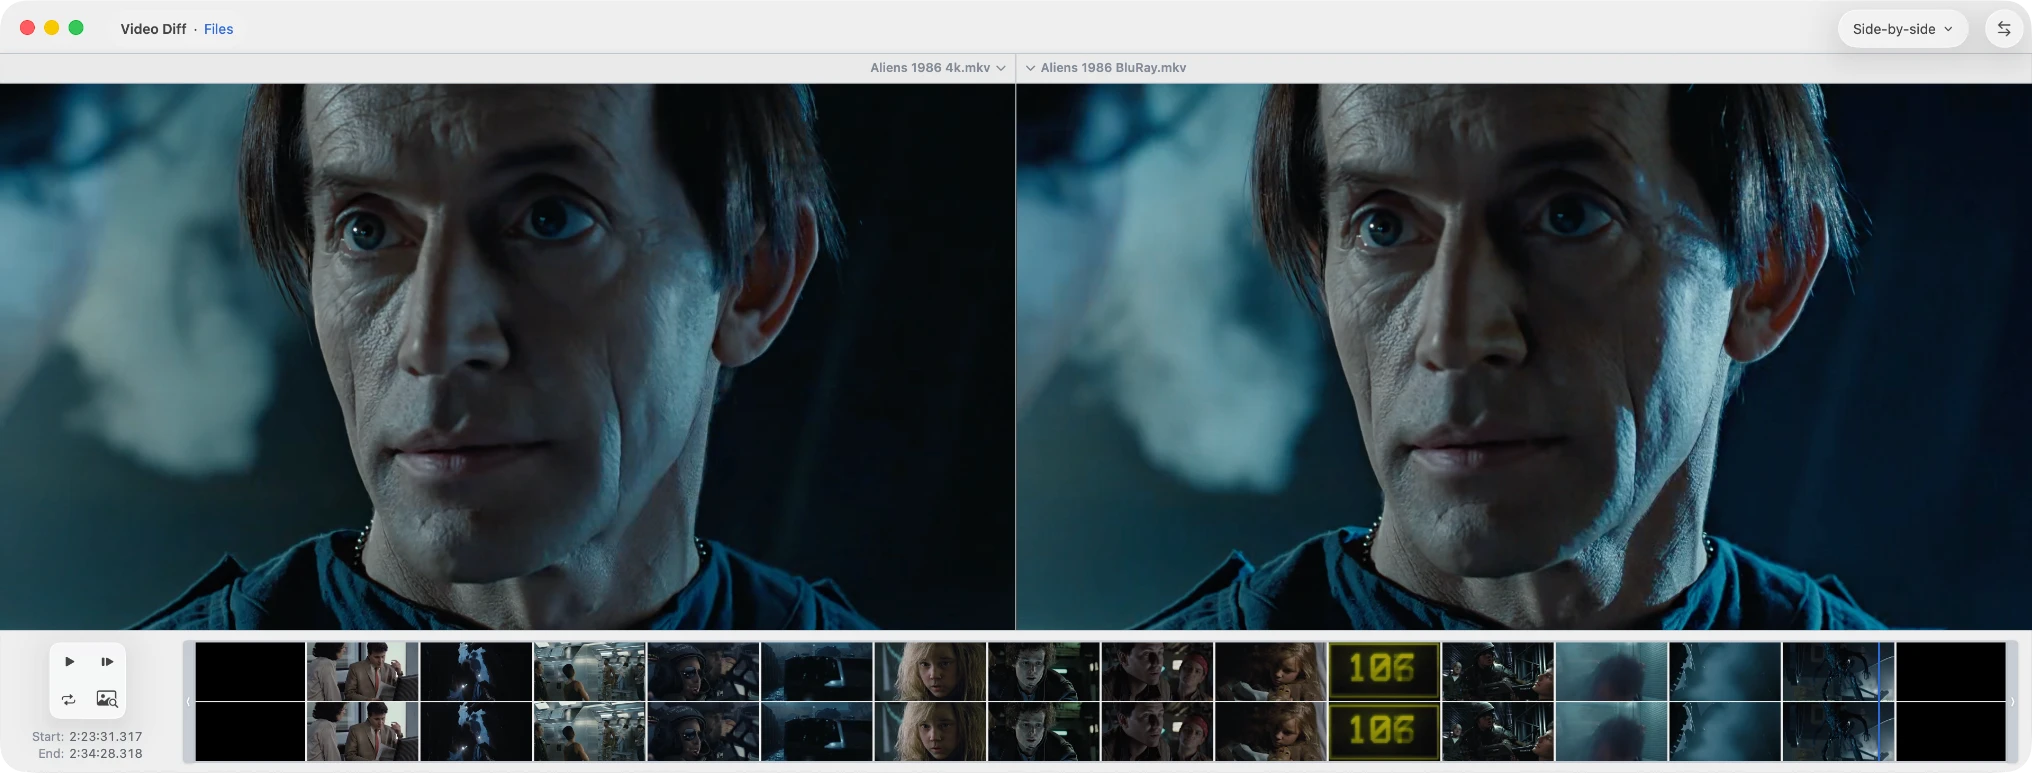
In the Aliens remaster, the useful evidence is local: a brighter cheek, a shifted background, a face that reads less severe than before. Taken together, those changes feel less like straightforward preservation and more like reinterpretation.
That is the real question in image review. Not just “did it change?” but “what changed here, and what does that do to the original look?”
A practical review loop
- Align images so corresponding pixels match.
- Start with an overview to understand the change before you measure it.
- Localize the change to a specific area.
- Dim the surroundings when needed. Forcing dark mode often helps because the image stays the brightest object on screen.
- Review at 1:1 to confirm what is actually happening.
- Use an analytical view or metric only to answer a specific question.
- Make a local decision based on the area that changed.
Every step reduces ambiguity. Skipping steps introduces it.
What this is really about
Image comparison is not about detecting difference. It is about making a decision.
The work is to move from broad impressions to local evidence, then decide what those changes do to the original image. Sometimes the answer is preservation. Sometimes it is reinterpretation. That is why the workflow matters.